ST Hosting Manual
Our manual
TeamSpeak create channel
Create a TeamSpeak 3 channel
You have your own TeamSpeak 3 server and want to create one or more channels on it, but you're not sure how to do it? Below, we'll explain to you how to create a new TeamSpeak 3 channel in just a few steps.
This guide works for TeamSpeak 3 servers rented from us as well as any other TeamSpeak 3 server.
To create a new channel, you'll need the necessary permissions. Usually, you'll need to be an administrator. If you have a TeamSpeak 3 server from us, you can find your permission key in the customer portal after your order. If you've already used it and still don't have administrator rights, our support team will be happy to assist you. Creating a Channel
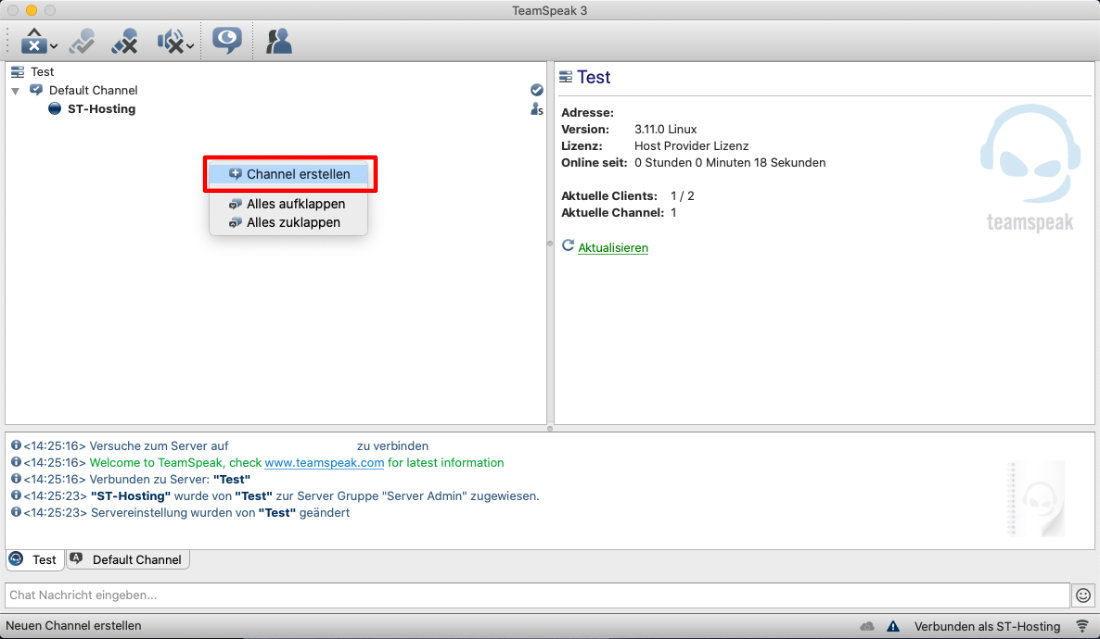
To create a TeamSpeak channel, you need to connect to your TeamSpeak server.
In the channel list (left sidebar of the client), right-click and select the "Create Channel" option to open the dialog for creating a new channel.
The most important values for a new channel are the "Name" and "Channel Type" fields. You can choose any name for the channel. When it comes to the channel type, it's important to select "Permanent" to ensure that your channel isn't deleted when there are no active users in it. If you want to restrict access to your new channel and prevent every user on the server from joining it, you can easily set a password for your channel in the "Password" field. This password will be required to join the channel.
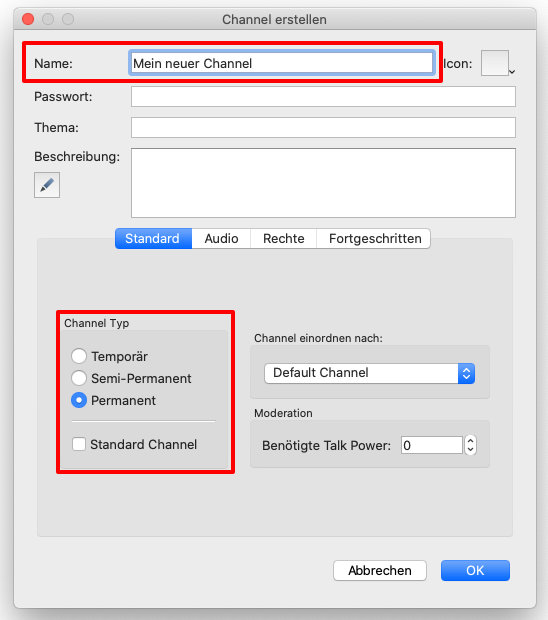
Under the "Audio" tab, you have the option to increase the voice quality of the channel. If you're using a music bot or streaming music in the channel, it's recommended to select the "Music" preset and increase the quality to the maximum level (10). This will ensure the best audio experience for users in the channel.