ST Hosting Manual
Our manual
Setup Let´s Encrypt
Setup Let´s Encrypt
Setting up the free Let's Encrypt SSL certificate for our web hosting packages is very easy and takes less than 60 seconds. In this tutorial we will show you how to activate your free SSL certificate in Plesk Obsidian.
Step 1
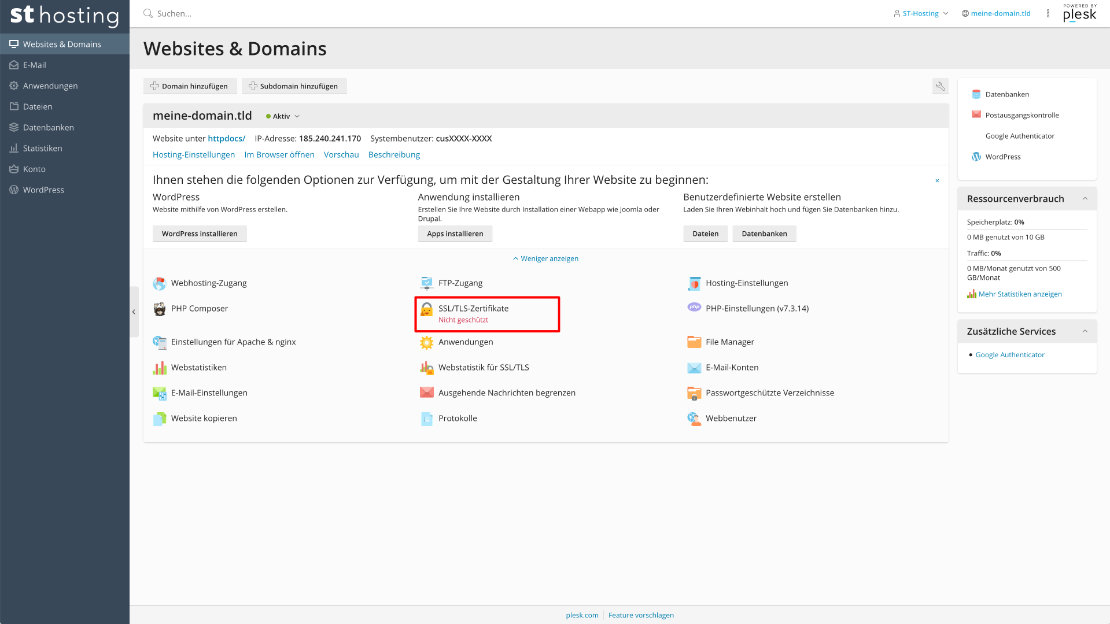
To activate Let's Encrypt for your domain, first log in to the Plesk interface. The easiest way to do this is via the "SSD Webspace" link under "Management" in the customer center.
In the Plesk interface you first have to select the "SSL/TLS certificate" item.
Step 2
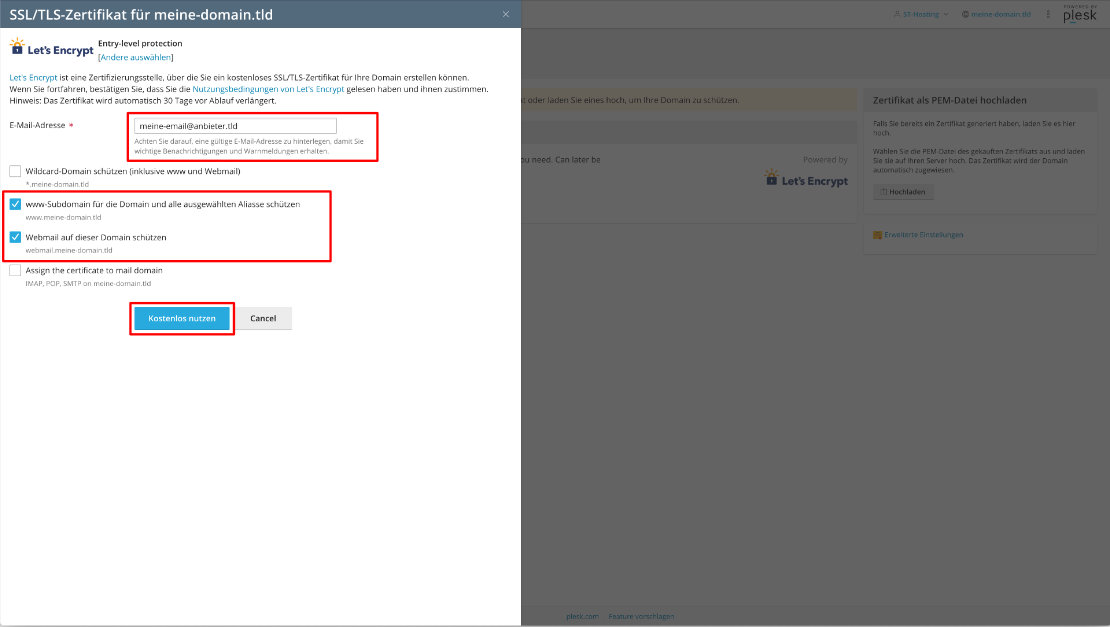
On the next page, click on "Use for free" to start the wizard for creating your Let's Encrypt certificate.
Then you have to enter your email address. To be able to create your certificate, please only select "Protect www subdomain for the domain and all selected aliases". If you want to use your emails via webmail at webmail.your-domain.tld, you can also activate "Protect webmail on this domain".
To apply for the certificate, click on "Use for free".
Important note: In order to activate and use Let's Encrypt, the DNS entries for all selected sub- / domains must now point to your web space.
Step 3
After a few seconds you will receive a message that your Let's Encrypt certificate has been successfully created and is ready to use.
Troubleshooting tips: If this is not the case, your DNS entries are probably not set correctly. Please check them and perform step 2 again. If you can't find the error, don't hesitate to write to our support, they will be happy to help you.